New customer setup guide: settings and devices
A practical 1app.energy onboarding guide for new customers: connect supported devices, set tariffs, choose Smart Control and check hardware.
The best time to set up 1app.energy properly is at the start.
If the devices, tariff, hardware details and Zappi CT roles are right, the app has a much better chance of showing a clear whole-home picture for solar, battery, EV charging and tariff behaviour.
If those settings are guessed, the dashboard may still look polished, but it can answer the wrong question.
This guide is for new 1app.energy customers. It explains what to connect, what each settings page means, and what to check before relying on the dashboard or enabling supported Smart Control.
It is not a list of example values to copy. Your tariff rates, CT roles, solar setup, battery size and control settings must match your own home.
The quick version: 1app.energy onboarding setup
For most new supported homes, the setup order should be:
- connect the supported devices first in Settings > Devices;
- sync the tariff after Octopus is connected, if you use Octopus;
- check Rate Plan so import, export, standing charge and cheap periods match your tariff;
- check Hardware so timezone, postcode, solar setup, solar size, reserve floor and battery details are right;
- choose the right Smart Control mode only after device and tariff data look sensible;
- configure Zappi Safety if you use a MyEnergi Zappi and CT clamps;
- save changes and review the dashboard after a normal day of operation.
The practical rule:
Connect the sources first. Then confirm they describe the same home. Then turn on automation only where the system is supported and the customer has enabled it.
Before you start the 1app.energy setup
Before opening the settings pages, it helps to have a few details ready:
- the login or connection details for supported devices, such as Solis, Octopus and MyEnergi Zappi where relevant;
- the Octopus account number and API key if you use Octopus Energy;
- the myenergi account details if you use a Zappi charger;
- the SolisCloud access path for the correct inverter plant;
- your postcode and timezone;
- the rated solar panel size in kWp, usually from installer paperwork;
- whether solar is measured by the inverter, by Zappi CTs, or by another supported source;
- the battery reserve level you want to keep back;
- the Zappi CT roles, if CT clamps are used.
If you need the individual connection walkthroughs, start with how to get your SolisCloud API key, how to get your Octopus Energy API key, and how to get your myenergi API key for Zappi.
The main point is not to connect everything blindly. A clean setup means each connected source describes the same physical home.
Step 1: connect supported devices in 1app.energy
The Devices page is where you connect, refresh and review the services that feed 1app.energy.
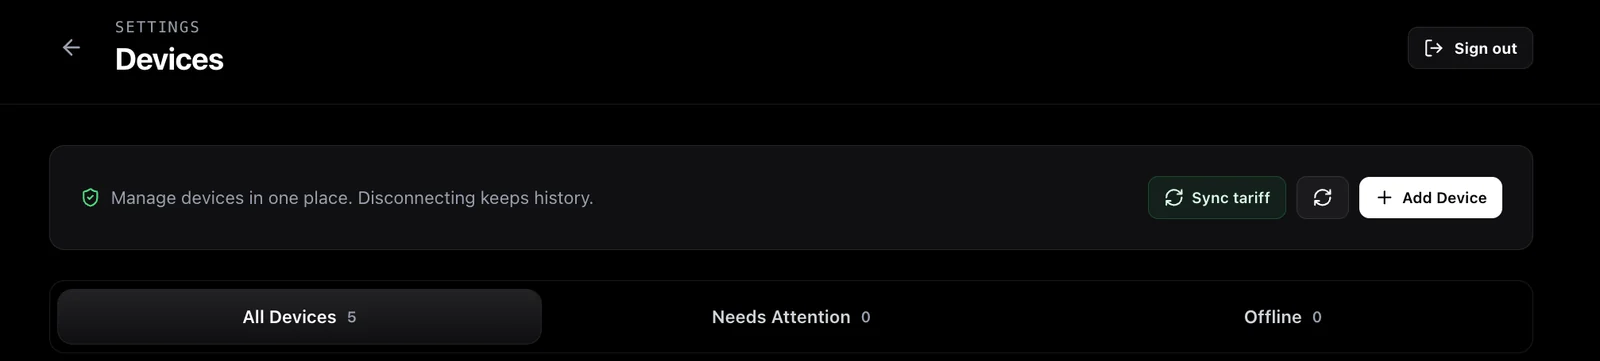
Use Add Device for supported integrations. Use Sync tariff after the Octopus connection is available, so the app can refresh tariff context from the supplier account.
During the current customer rollout, focus on the supported devices that apply to your home. For many early 1app.energy homes, that means combinations such as:
- Solis inverter or Solis hybrid inverter;
- Octopus Energy tariff data, where the customer uses Octopus;
- MyEnergi Zappi, where the home has a supported charger.
Daikin heat pump support is still in review and is not open for this customer-testing phase. Enphase microinverter integration is also not offered in the current rollout, and there is no public rollout date yet.
If you do not see Daikin or Enphase options in your customer setup, that is expected.
The Devices page may change as supported integrations are added, but the principle stays the same: a device should only be treated as live when the backend has verified it is connected and reporting for the correct installation.
Step 2: check your Rate Plan settings
The Rate Plan page tells 1app.energy how electricity prices apply to the home.
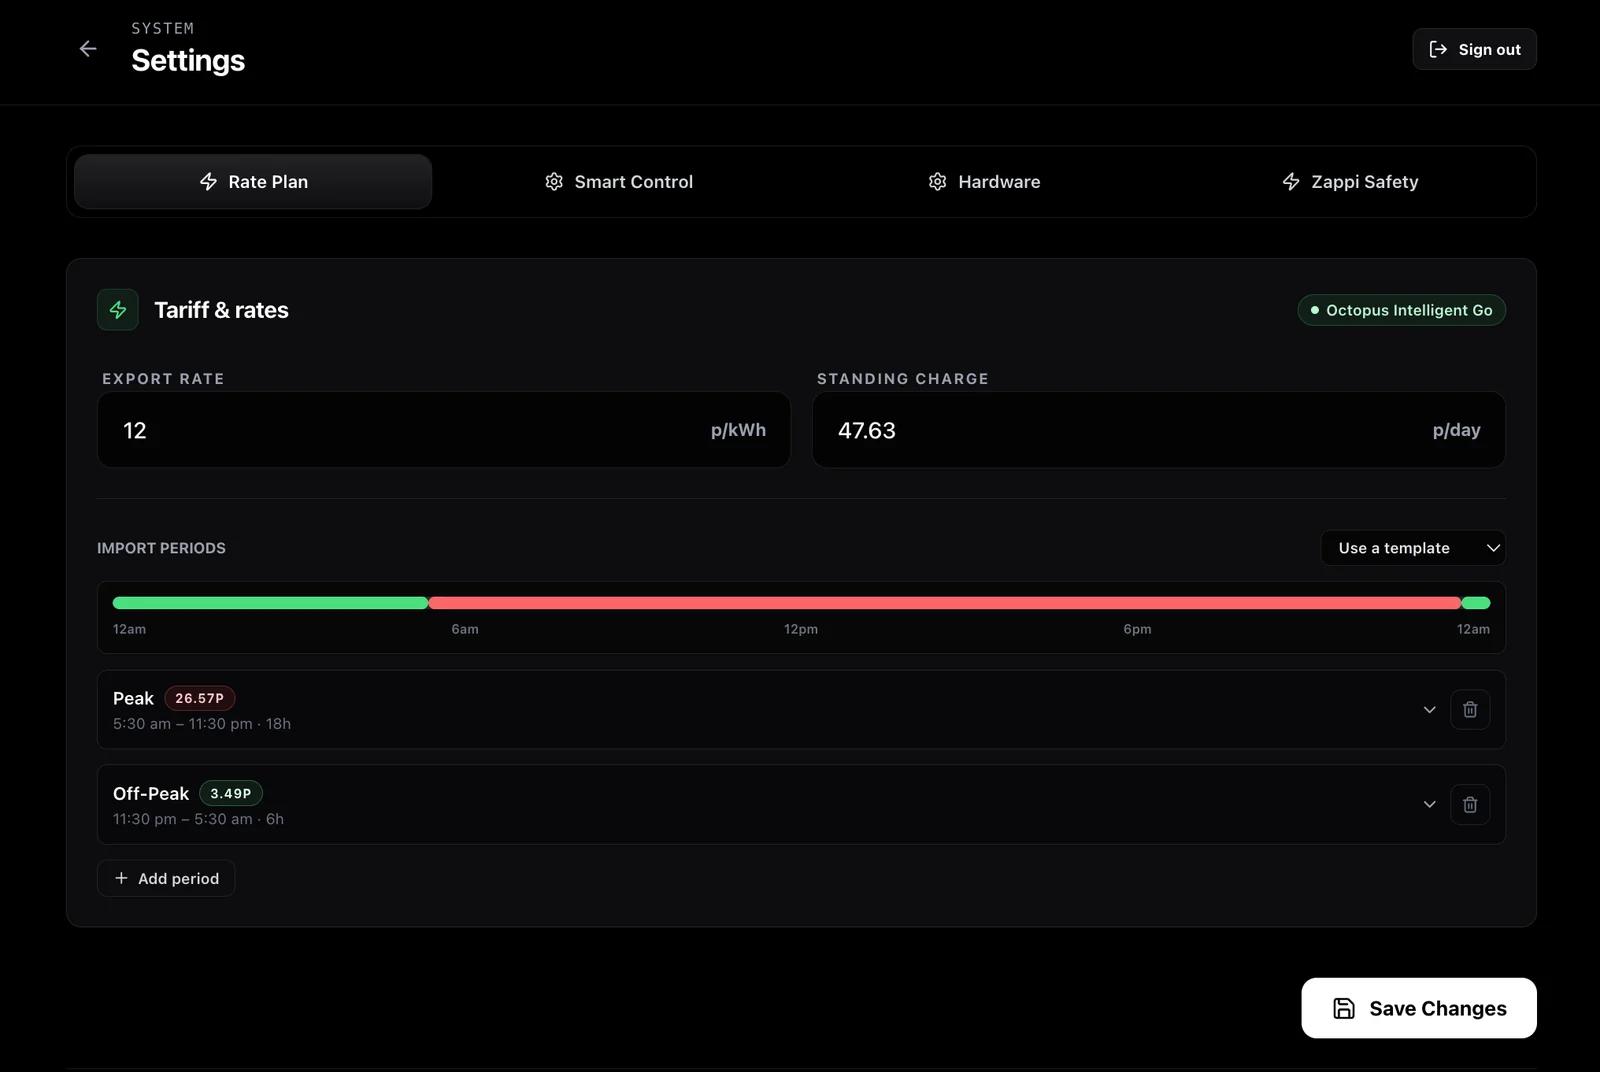
If Octopus is connected, the app may show the detected Octopus tariff. You should still review the numbers.
Check:
- the tariff label is the one you expect;
- the export rate is right for your export arrangement;
- the standing charge is correct;
- the peak and off-peak rates match your supplier information;
- the import periods cover the right times;
- any template you use matches the tariff you are actually on.
1app.energy can also work with other tariffs. If the tariff is not supplied automatically, you can set the rates manually.
That matters because the app should not guess someone else's tariff. Missing or unsynced rates should stay blank, zero or pending until Octopus sync or a manual save supplies the real values for your home.
If you are on a dynamic tariff, such as Octopus Agile, the behaviour is different from a fixed overnight tariff. We explain that separately in how 1app.energy works with a Solis inverter on Octopus Agile.
Step 3: check Hardware settings for the home
The Hardware page describes the physical home: location, solar setup, reserve floor and battery details.

Start with the basic fields:
- Timezone is used for scheduling and sunrise or sunset timing.
- Postcode helps with local solar generation forecasts.
- Solar setup controls whether solar appears in the dashboard and where solar is measured.
- Solar panel size should be the rated peak output of your PV array in kWp.
- Inverter reserve floor is the lowest battery level you want to keep back.
For the battery pack, 1app.energy may detect battery units and capacity from Solis inverter telemetry. If the battery is detected, treat that as the preferred source.
Manual fallback values are mainly useful when the inverter is not reporting pack size and the app asks for installer-paperwork values. They should not override a verified inverter reading.
Solar setup deserves care.
If solar is measured by Zappi CTs, the Hardware page and the Zappi Safety CT mappings need to agree. If solar is measured by the inverter, do not also tell the app that the same solar is a separate external CT source unless that is truly how the home is wired.
This is the same source-of-truth issue we discuss in Can you trust your home energy dashboard? Start with the source of truth.
Step 4: choose Smart Control only after the setup is clear
Smart Control should be enabled after the device, tariff and hardware picture is believable.
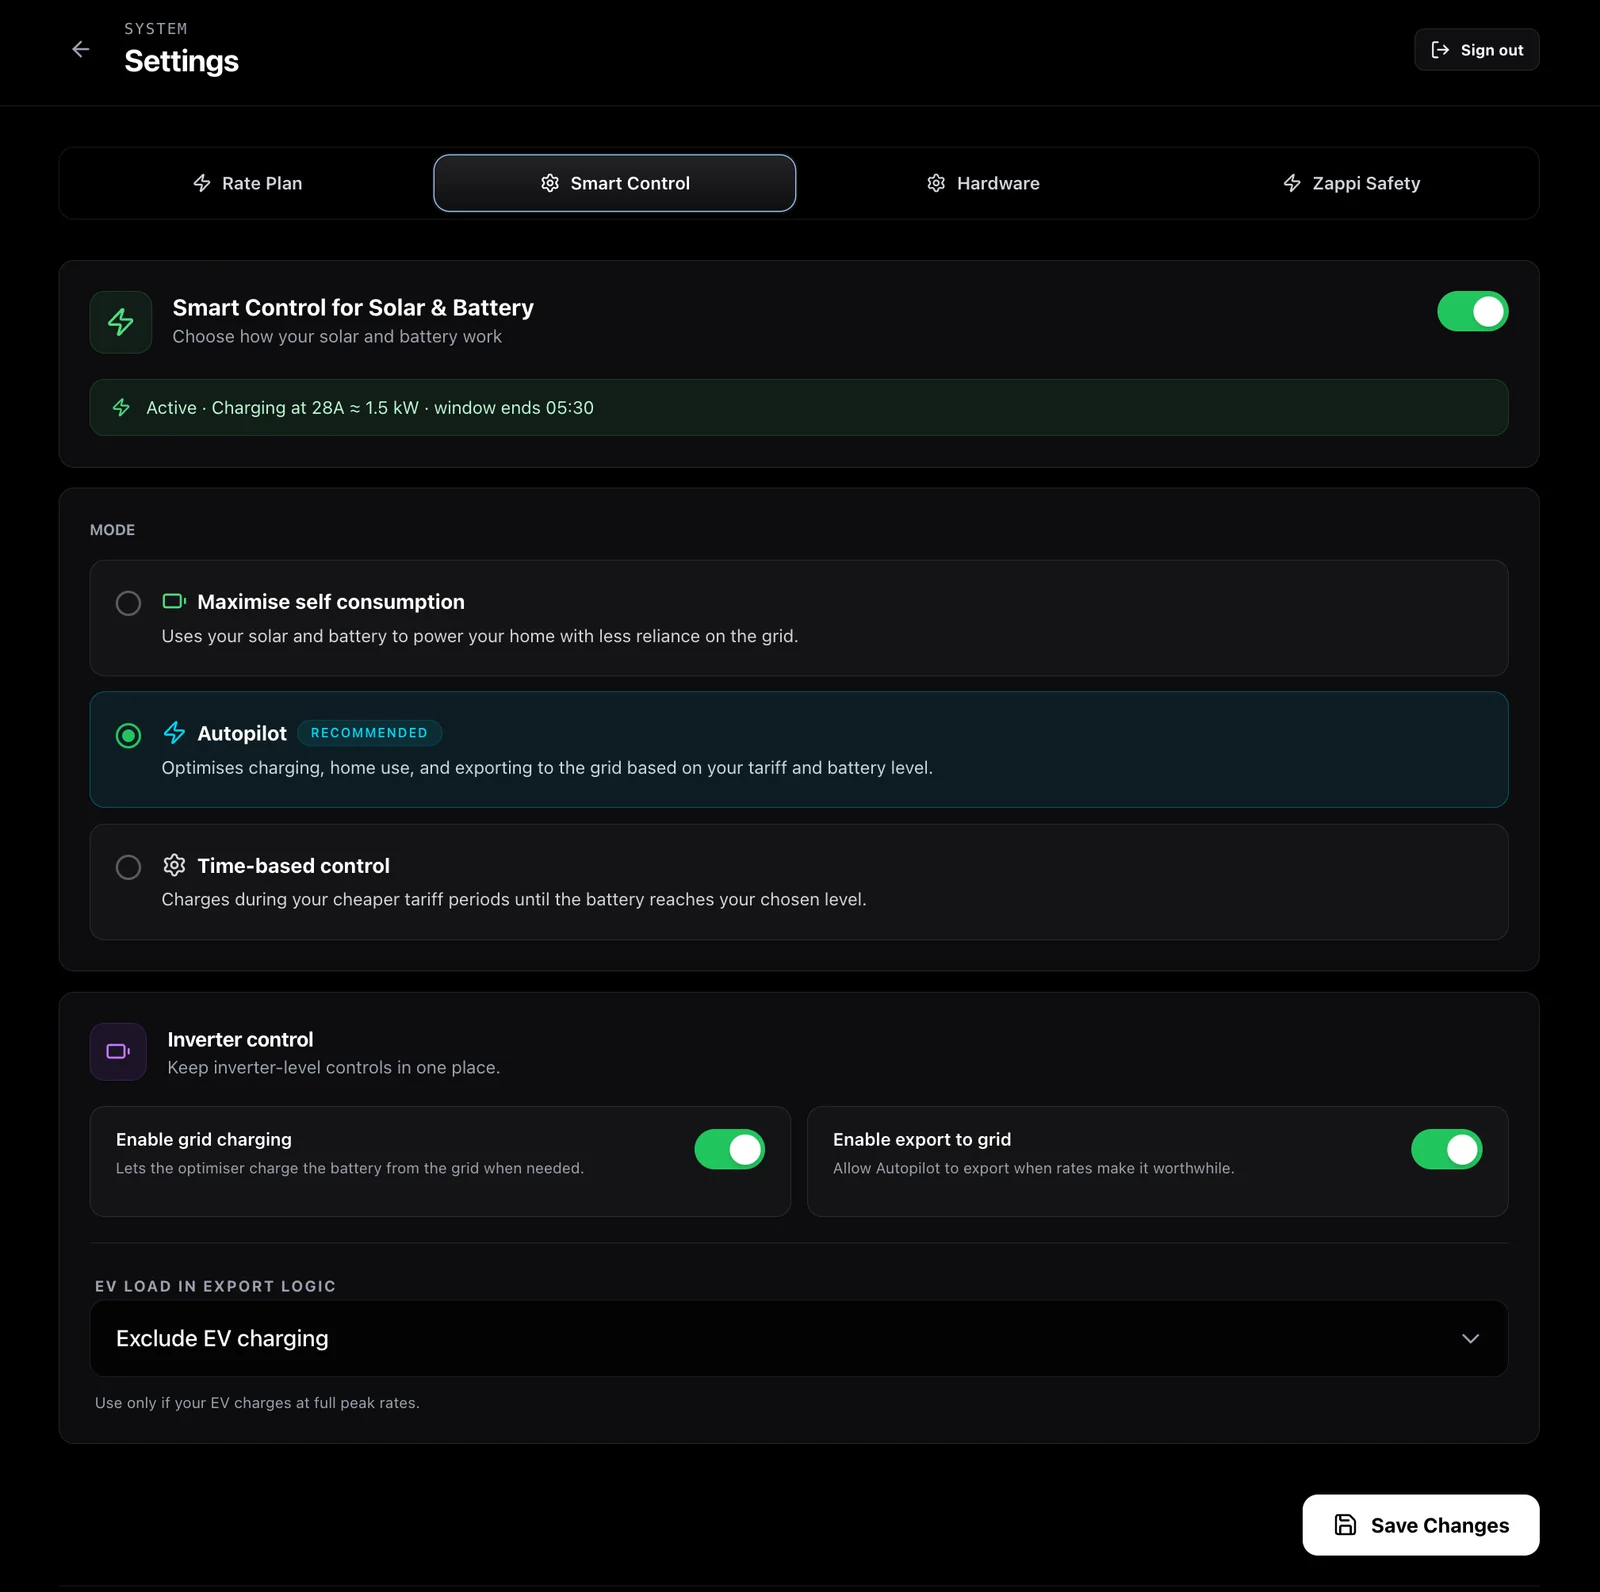
The main Smart Control choices are:
| Mode | What it is for |
|---|---|
| Maximise self consumption | A simpler home-first style where the home uses solar and battery with less reliance on the grid |
| Autopilot | The recommended starting mode for many supported homes, balancing charging, home use and export decisions around tariff and battery state |
| Time-based control | A simpler mode that charges during cheaper tariff periods until the battery reaches the chosen level |
You can read the longer comparison in which 1app.energy Smart Control mode should you use.
The inverter controls below the mode selection matter:
- Enable grid charging lets the optimiser charge the battery from the grid when needed and supported.
- Enable export to grid lets Autopilot export when rates make it worthwhile and the site supports it.
- EV load in export logic controls how EV charging is treated in export decisions.
Do not turn these on because they sound useful. Turn them on because they match what you want the home to do and because your installation supports that behaviour.
For example, if an EV charger can look like a large household load, battery behaviour can become confusing without charger context. We explain that pattern in why Octopus smart charging can drain a home battery.
Step 5: configure Zappi Safety and CT roles
If your home uses a MyEnergi Zappi and CT readings, the Zappi Safety tab is important.
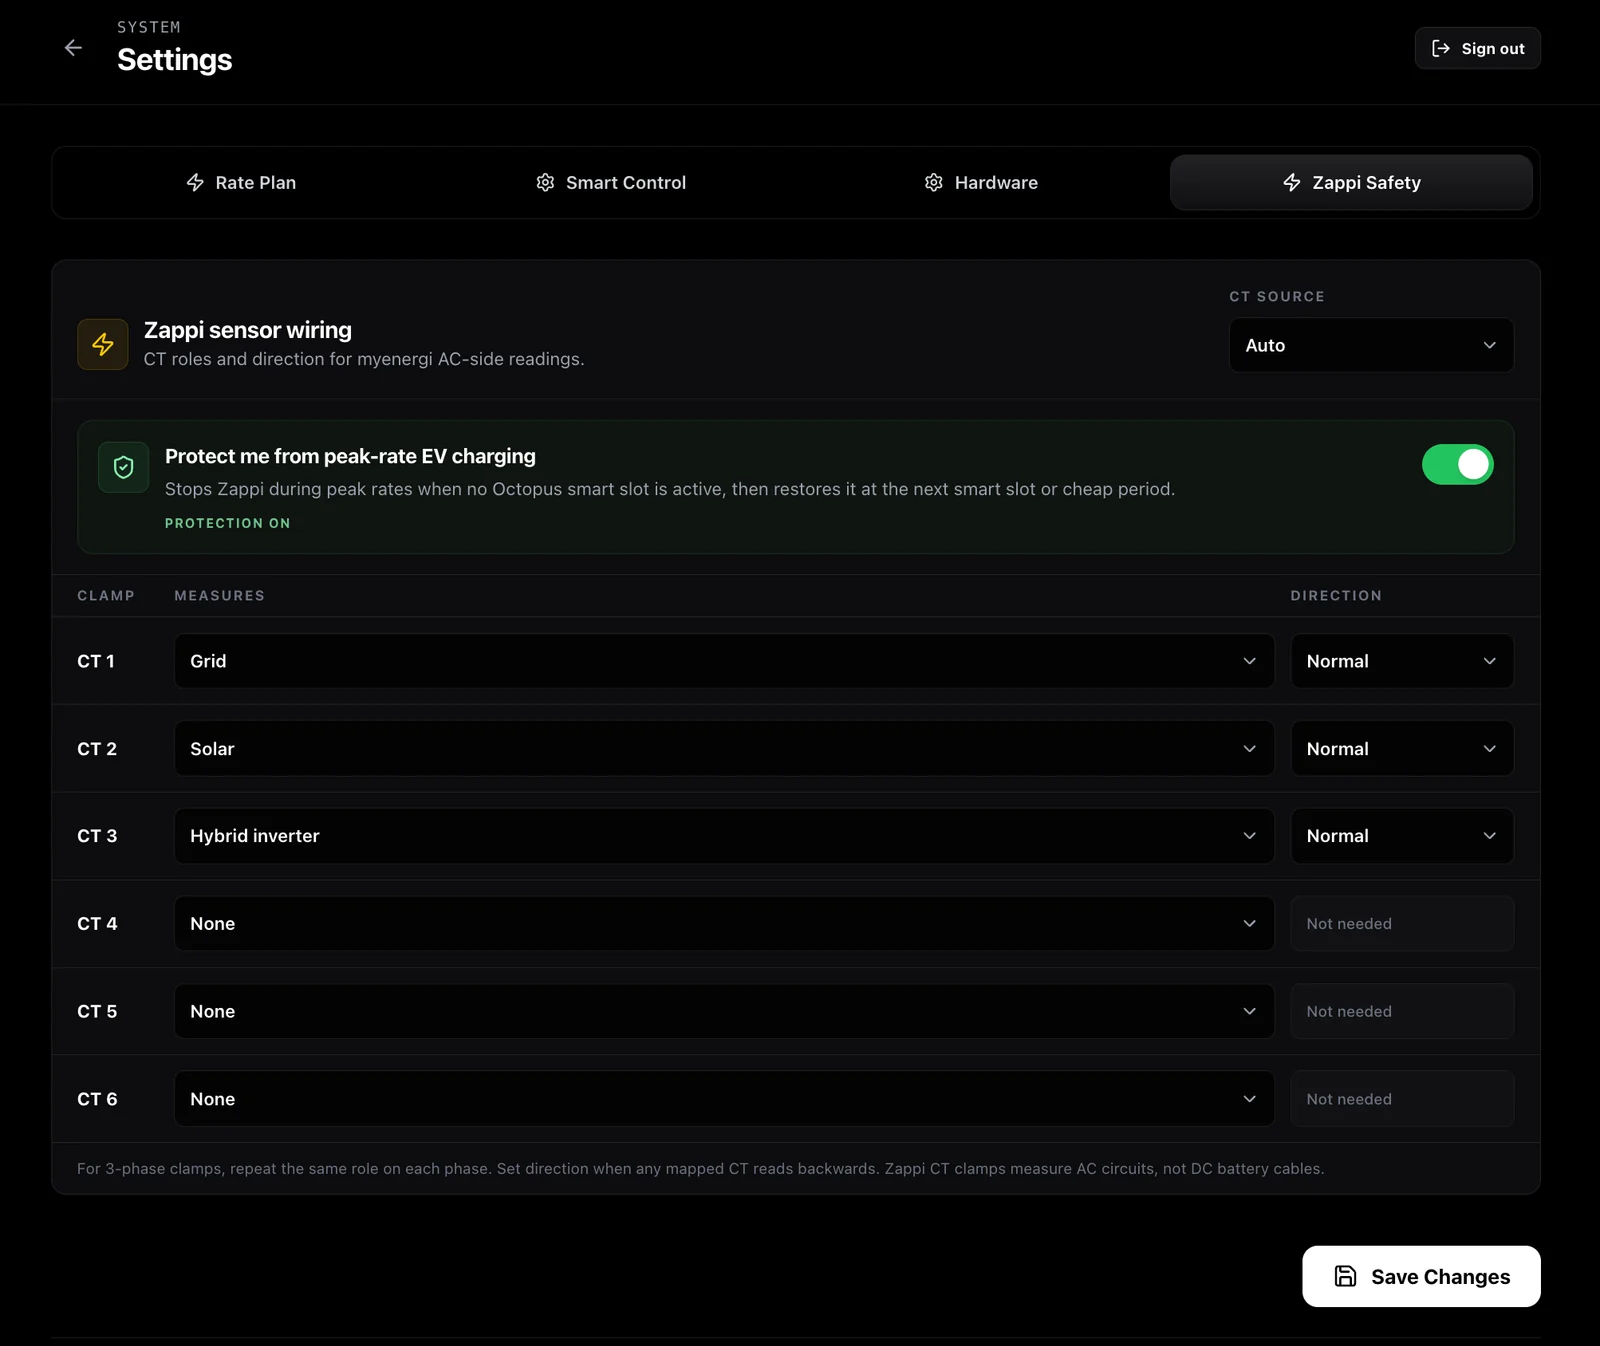
The CT roles tell 1app.energy what each clamp measures.
For a typical single-phase setup, you might see roles such as:
- Grid for the main grid import/export circuit;
- Solar for AC-side solar measurement;
- Hybrid inverter for an inverter-related AC circuit;
- None for unused CT inputs.
Do not guess these roles. Use installer information, the myenergi app, or support guidance.
The Direction field should normally stay at Normal unless the mapped CT reads backwards. If a CT is reversed, the app may misunderstand import/export or generation direction.
There is also an important electrical boundary:
Zappi CT clamps measure AC circuits. They do not measure DC battery cables.
So if you see a battery-related role in the software model, do not assume a CT clamp is physically clipped around a DC battery cable. The role is about how the AC-side home energy model is interpreted.
For more detail, read Zappi CT mapping for solar, battery and home energy dashboards.
The peak-rate EV charging protection toggle is designed to help avoid supported Zappi charging at peak rates when no Octopus smart slot or cheap period is active. It should be used where the charger, tariff and setup support that protection.
Step 6: save changes and check one normal day
After changing any settings tab, use Save Changes.
Then give the system a normal day to settle. A normal day is better than a commissioning day because the home has had time to show real solar, battery, grid and EV behaviour.
Review:
- whether the current tariff view matches the supplier account;
- whether solar appears only when your home really has solar;
- whether the battery capacity and state of charge look believable;
- whether grid import/export direction makes sense;
- whether EV charging appears when the car is actually charging;
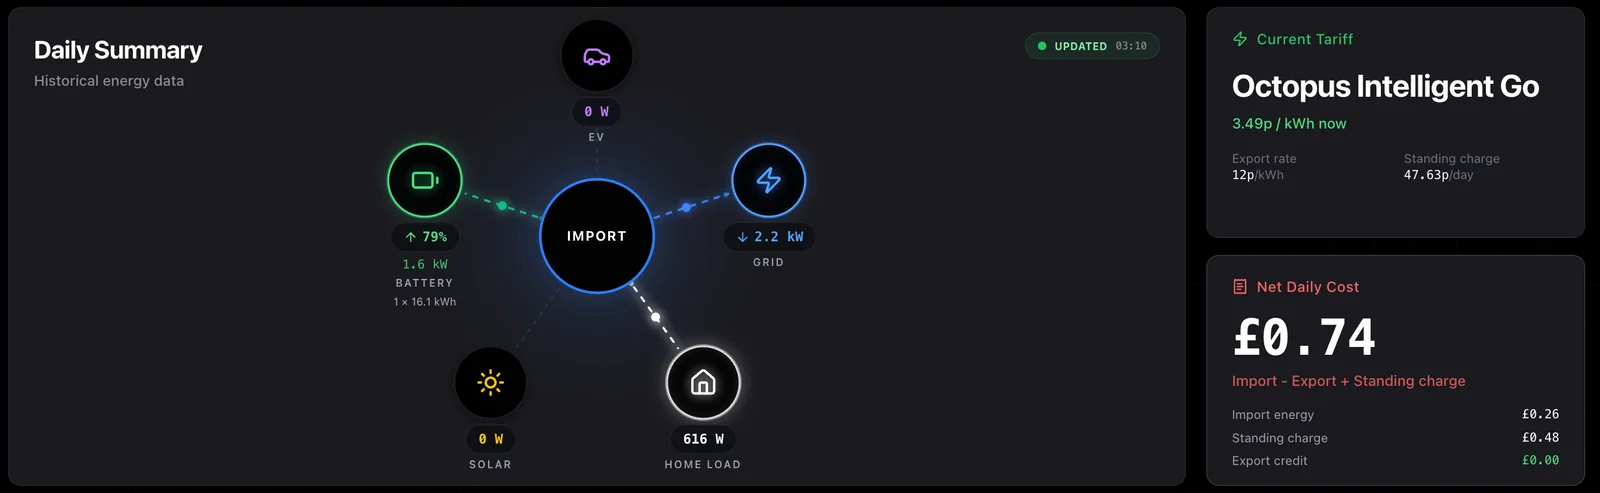
- whether the Nexus power-flow view shows a coherent picture rather than missing or contradictory parts.
If something looks wrong, it is usually better to fix the setup source than to ignore it.
For example, a wrong CT role can make a charger or solar branch look like the wrong kind of load. A wrong tariff can make battery timing look irrational. A wrong solar setup can make the dashboard show solar on a home that should not have it.
Common setup mistakes to avoid
| Mistake | Why it matters |
|---|---|
| Copying screenshot values | The screenshots are examples; your home needs your own tariff, CT and battery values |
| Forgetting to sync tariff | The app may not have the latest Octopus tariff context |
| Leaving solar setup unclear | Solar may appear in the wrong place or be hidden when it should be shown |
| Guessing Zappi CT roles | Grid, solar, EV and inverter behaviour can become misleading |
| Treating a visible device as controllable | A device must be verified and supported before control should be trusted |
| Enabling export without understanding the tariff | Export behaviour should match the customer's tariff, permissions and battery strategy |
| Expecting Daikin or Enphase options in this rollout | Daikin is still in review and Enphase is not offered at this stage |
The goal is not to fill every box.
The goal is to give 1app.energy enough verified information to describe the real home.
Common questions about 1app.energy onboarding
Do I need every device connected before using 1app.energy?
No. You only need the supported devices that apply to your home.
A Solis-only home, a Solis plus Octopus home, and a Solis plus Octopus plus Zappi home may each have different setup needs. More devices can add context, but only when they are connected and mapped correctly.
What if I am not on Octopus?
You can still use manual tariff settings where the current rollout supports your setup.
Octopus connection is useful because it can supply tariff context directly, but the Rate Plan page exists so other tariff structures can be entered manually.
Should I always use Autopilot?
Autopilot is a good starting point for many supported homes, but it still depends on verified device data, tariff context and customer-enabled controls.
Use it when your device connections, tariff setup, battery data and permissions are ready. If you want simpler cheap-window charging, Time-based control may be easier to understand.
Why are Daikin heat pump and Enphase not available to me?
Daikin heat pump support is still in review and is not open for this customer-testing phase.
Enphase microinverter integration is not offered in the current rollout. It may be considered in future, but there is no public date yet.
What should I do if the dashboard looks wrong after setup?
Start with the source settings.
Check the Devices page, Rate Plan, Hardware, Smart Control and Zappi Safety before assuming the dashboard itself is broken. Most confusing energy views come from one source being stale, unmapped, reversed or describing a different part of the home.
Why does 1app.energy care so much about CT mapping?
Because a CT clamp can change the meaning of the whole energy picture.
If the app thinks a CT is grid when it is solar, or solar when it is an inverter branch, daily totals and live flow can become confusing. Zappi CT clamps measure AC circuits, so the role and direction must match the actual wiring.
Final thought on 1app.energy onboarding
A good setup should make the app feel calm.
The customer should be able to open 1app.energy and understand what the home is doing: solar, battery, EV charging, grid and tariff in one place.
That only works when the connected sources are honest, verified and mapped to the same home.
Visit 1app.energy and sign in to complete your customer setup.
Relevant smart controls
These mode pages are the closest product-side follow-on from the issue explained in this article.
Autopilot
The best starting mode for most homes. Autopilot balances when to charge, hold, or export by weighing tariff value, later home coverage, forecast solar, and your protected minimum battery SoC so profitable export should not create later high-rate import.
Home First
A simpler home-first mode. It prioritises running the home from your own solar and battery first, minimises grid dependence, and avoids optimiser-led battery export.
Time-based Control
A simple target-based mode. Time-based Control charges the battery during your cheaper tariff periods until it reaches the level you choose, without optimiser-led export.
Does this sound like your home?
Your setup might already qualify.
Tell us which devices and tariff you are on. We review every request and invite in order of fit, not sign-up date.